When your pie recipe calls for you to praining the crust, do you envision spilled beans, hot parchment and a sad, slumped crust on the bottom of the pan?
Avoid all that with aid of simple gravity and a couple of pie pans. Baking your pie crust upside down (!) Is a guaranteed method to make the perfect prebaked crust – one that bikes to an even golden brown and maintains its shape.

Why you should pribake your pie crust upside down
Some recipes call for priing your pie crust (eg, Chocolate cream pie). But the unfilled pie is more challenging as it seems. Like the “nude” crust bakes, Be fat (butter and / or shorten) melts. And without the pressure of filling to keep it in place, the crust slips down the sides of the pan. This tendency to decline is especially observed with All-butter crustSince butter's melting point is lower than those of other fats.
PJ Hamel
You can partially prevent sniping through lining the crust with Parchment And filling it with beans, Pie whitesOr Granulated sugar. But the process can be challenging, especially when removing the hot wheat and parch matchway by baking to finish brown the crust the crust. And honestly, you will still see a beautiful amount of shrinkage.
It is a more effective way to keep your crust in shape, which one of our favorite bakwaths, Benjamin Delwave, surfaces in his new book, Cargo courses: Turn gravity of an enemy in your ally by preaging pie crust upside down.
How to Project your pie crust upside down
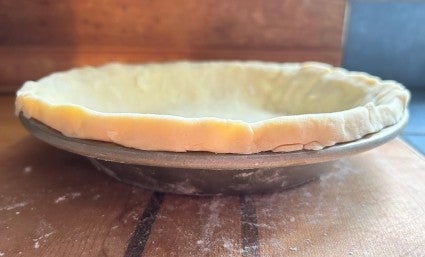
For a typical 9 “x 1 1/2” Pie Pan, roll your pastry in 13 “to 14” round; You want it big enough to settle in the pan without stretching and with plenty of backhang.
PJ Hamel
Put your rolled-out crust in the pan, folding its edges over and pressing them into a ridge around the rim.
PJ Hamel
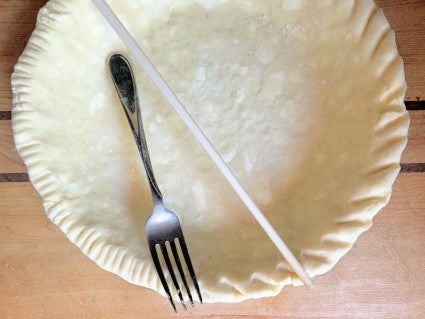
Do a simple crimp, if you want. זיין וויסנד אַז קאַפּויער פון באַקינג קען נישט זיין פאַנטאַזיע אָדער הויך קרימפּס, ווייַל די וואָג פון די אַרויס פּאַן וועט דריקן אַראָפּ און פלאַטאַן די עדזשאַז פון די עדזשאַז פון די רעדז.
PJ Hamel
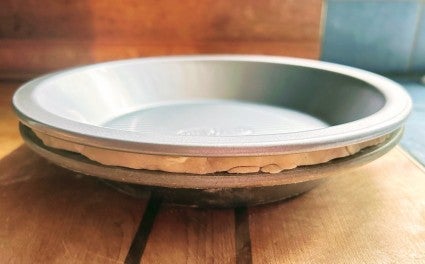
Center a Parchment round With this crust (8 “or 9”, for typical of 9 “pie), and nest a second identical pie crust” sandmet,. If you do not have parchet.
PJ Hamel
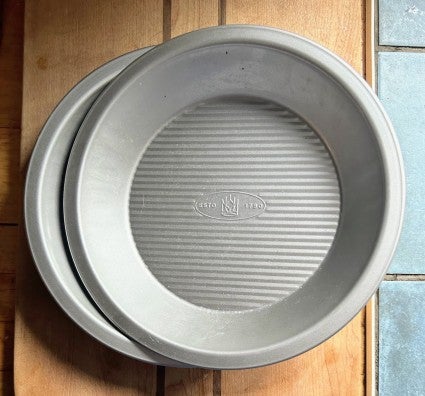
For the most secure fit, it is important that the pans are identical; We recommend our King Arthur PansWhich are not only the ideal pie in so many ways, but also stack together perfectly.
Can the pans his glass or stoneware, or do they need to be metal? We find metal, with its higher heat transferences, works best. Ceramic and glass pans take more baking and can dry out your crust in the process.
PJ Hamel
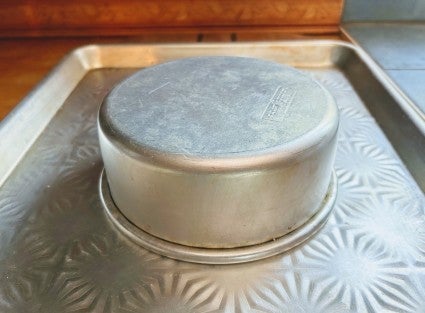
Center a 6 “round Cake pan On a Backing sheet. Make sure that the cake pan is deep enough for the pie pans to rest AUP it without touching the baking sheet touch. Use the Canan Pan as a small panist, simply makes it easier to capture the pie pans when you need to move them in and out of the oven.
PJ Hamel
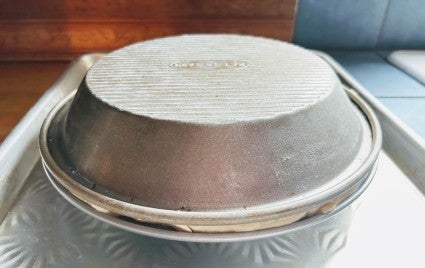
Holding the two pans together, upset them and put them on the circular pan. (Don't have a 6 “con Pan? Just put the inverted pans directly onto the baking sheet.)
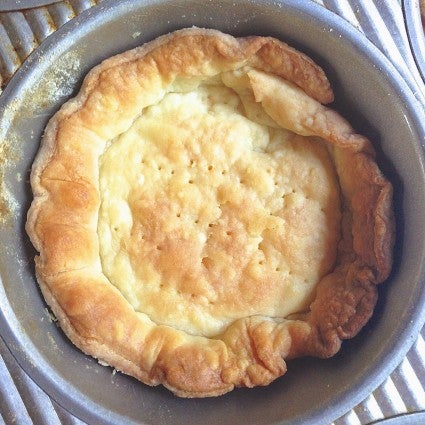
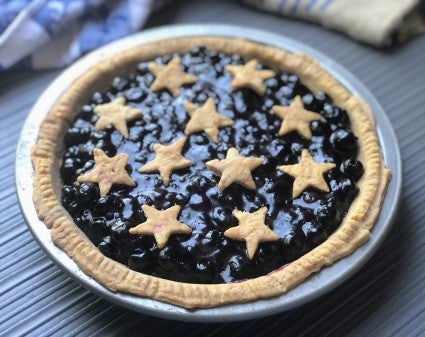
Bake the crust in a preheated 375 ° F oven for 20 minutes. Remove it from the oven and carefully upset it so that it is right side, and remove the top pie pan. At this point your crust is part baked, ready to be filled and baked next (as with this Classic sweet potato pie).
For pies whose filling is in a fully baked crust (eg, Banana Cream Pie) You will need to continue baking the scorility as follows: Up upset the pans right-side up, lift off the top pan, remove the parcheteen. Return the crust to the oven, right side up, and bake for an additional 15-20 minutes, or until lightly golden brown.
PJ Hamel
For the best results
Even pie slkkke baked upside down will shrink a little. But if you have some extra time, here are two steps you can begin to minimize the shrinkage as much as possible:
- Refrigerator your nest crust for about 30 minutes before baking. You can do this as your oven preheats. Chilling relaxes the Bluan of flour, which makes the crust less likely to shrink. It also solidifies the fat that helps the crust maintain its structure.
- Bake the crust for 40 minutes (instead of 20) before removing the nesting pan. This applies to both fully baked and partly baked crusts. An longer “sandwiched” bake ensure the crust will have completely and will keep the shape perfectly once the nesting pan is removed.
Cover photo by Patrick Marinello; Foods stealing by Yekaterina Boytsova.