Getting entered Sourdoy Baking Can feel overwhelming. Back when I was a newbie, I did not realize how much science and math is involved in my new hobby! At this point: You can see other Sourdouge Bakers throw out numbers as 1: 1: 1 or 1: 4: 4. The refer to feeding ratios, a simple but useful tool for maintaining your starter. If mathematic makes you nervous, don't worry! Feeding ratios are easy to understand, and learn how to use they can help you customize your SourDough maintenance and baking plan.
What is a sourdough feeding ratio?
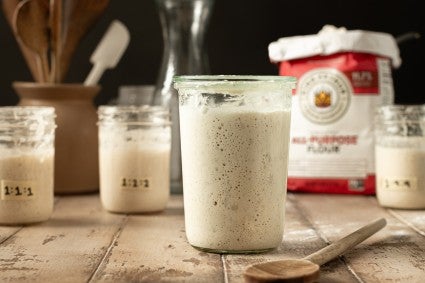
In Sourdu backing, a feeding ratio simply refers to the proportion of flour and water used to feed a sourdough starter.
The feeding ratio comprises three numbers: first, the sourdough starter, commonly called the seed, followed by the flour and water. So, a 1: 1: 1 Feeding ratio means the sourdough starter, flour, and water have been added in equal amounts by weight. For example, if you use 100 grams of seed, you will add 100 grams of flour and 100 grams water to feed your sourdough starter. A 1: 2: 2 ratio, currently, means you would add 200 grams of monic and water to 100 grams of Sourdough Starter.
Photography and food stealing by Hannah Dela Cruz
Why are feeding ratios important?
Feeding rushios decide how much nourishment your starter takes. A starter needs enough nutrition to stay healthy. In minimum, a starter should be fed at a 1: 1: 1: 1 ratio, also known as a 100 percent hydration starter; The gives enough food to keep the community of microorganisms in your culture well, well-fed, well-fed, and in weight, and there is an ordinary feeding ratio (included in The sound hoof of King Arthur's Sourdun Starter Recipe!).
How Much You Feed Your Sourdough Starter also determines how fast it rises. The more flour and water you add in proportion to the starter (in other words, the last two numbers in the feeding ratio), the more time it will take for the starter to consume all the hair. Therefore, the slower it will rise and the more it will take to Reach top ripeness (The point in which it is ready to be used to make bread).
At warm room temperature (about 78 ° F) A sound gramifying sourdough Starter Fed at 1: 1: 1 will usually reach its peak after about 4 to 6 hours. (This timeline can vary between 4 to 8 hours, depending on the health of your starter and the temperature of your kitchen.). This is when the starter is at her most vigorous. At this point, your starter has consumed most of the flour it is fed; The starter will begin to fall, decreasing in volume, and the natural yeast and good bacteria will become less active. After 12 hours, it will be ready to feed again.
How can I use feeding ratios in my Sourdough Baking Routine?
A feeding ratio is only another variable you can manipulate customize your starter design. Need your starter ready to bake with asap? Go for a smaller feeding ratio, so your starter picks are quickly. Want to feed your starter in the morning so it is ready to use after work? Add a higher percentage of flour and water when you feed it, so that it grows slowly.
Here is a look like this all work.
Testing Different Sourdo Feeding Rating
To explore how different feeding ratios allow you to tailor your starter to suit your design, I conducted an experiment comparing three common ratios.
Let's say I make a prescription that calls for 180 grams of starter.
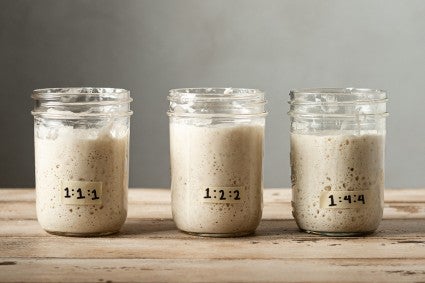
I tested three feeding ratios; 1: 1: 1: 1: 2: 2, and 1: 4: 4: 4 to see how quickly my starter would be ready for baking for baking for baking for baking for baking for baking for baking for baking for baking for baking for baking for baking for baking for baking for baking for baking for baking for baking for baking for baking for baking for baking for baking for baking for baking for baking for baking for baking for baking for baking for baking for baking for baking for baking for baking for baking for baking for baking for baking for baking for baking for baking for baking for baking for baking for baking for baking for baking for baking for baking for baking for baking for baking for baking for baking for baking for baking for baking for baking for baking for baking for baking for baking for baking for baking for baking for baking for baking for baking for baking for baking for baking for baking for baking for baking for baking for baking for baking for baking for baking for baking for backing Baking for baking for baking for baking for baking for baking for baking for baking. For this experiment, I used a Brod & Taylor Bumd Fifer To keep the starters in an optimal temperature (78 ° F).
NOTE: It is important to remember that each starter is unique, and the timelines are only a guide based on my personal starter. Depending on the sound and maturity of your starter, as well as the temperature in your kitchen, your rise time may be shorter or more.

Photography and food stealing by Hannah Dela Cruz
Photography and food stealing by Hannah Dela Cruz
1: 1: 1 = 60 g (starter): 60 g (flour): 60 g (water)
- After 4 hours: Doubled, a note rise, bubbles visible on the surface and evenly distributed over; The starter is ready to use for baking
- After 8 hours: Streaks Show that the starter is starting to fall, indicating it is much much condition; The starter can still be used for baking bread
- After 12 hours: Significant decrease in volume, after a few bubbles visible but ready to be fed
1: 2: 2 = 36 g (starter): 72 g (flour): 72 g (water)
- After 4 hours: Nearly doubled in size with a perceived promotion but not pointed yet, bubbles visible at the bottom of the starter, but none on the top portion or breaking to the surface
- After 8 hours: Peaky, doubled in size and showed an even distribution of large bubbles over the starter; Ready to use for baking
- After 12 hours: Start to fall, would still be good to use for baking but should be fed soon.
1: 4 = 20 g (starter): 80 g (flour): 80 g (water)
- After 4 hours: Noticeable rise, but is not doubled in volume; Only slightly small bubbles over the starter
- After 8 hours: Nearly Doubled in size, bubbles visible on the surface and evenly distributed over, but not quite pointed after
- After 12 hours: Completely doubled in size, Pointed, with even distribution of bubbles; Ready for baking
What is the best feeding ratio for my starter?
Each Sadowugh starter is unique, so the best feeding approach depends depends on your needs and baking routine. By personalizing as you feed your starter, you can make the exact amount you need while you control when it is ready for baking for baking for baking for baking.
For example, if you take on a sourdeage recipe in the afternoon, a 1: 1: 1 ratio is right for you. Feed your starter in the morning and in about 4 to 6 hours, it should be ready to bake bread. However, if you are planning to make up your recipe in the morning, feeding it a 1: 4: 4: 4 ratio before bed would work best, because it would be ready to bake approximately 12 hours later.
Choosing the right feeding ratio also provides control over your starter maintenance design. A 1: 1: 1 ratio requires more frequent fittings, while higher ratios as 1: 8: 8: 8 or 1:10:10 Extures, so that you can only have to feed starter once a day.
Note: Starters Fed in different ratios will not make any difference as they perform in baking; The primary difference is how long it will take a starter to top.
Photography and food stealing by Hannah Dela Cruz
Can I use volume measures to calculate my feeding ratios?
Feeding ratios are always based on weight, not volume. Since liquids are denser than solids, calculating the ratios by volume simply does not work. For example, a cup of flour weigh 120 grams, while a cup of water weighs about 226 grams – you can see how using cups and tablespoons will throw off the ratio. In addition, flour effensity can vary depending on how it is measured, which means a cup of flour can as it differently depending on whether it is sked and packed. For the best results, always measure by weight with a Scale.
Now that you know you can fit a Sourdoodh routine in your plan, why don't try some of our Sourdui Recipes?
Cover photo and food stealing by Hannah Dela Cruz.