While cold weather makes baking a cozy affair, Ours Dough, whether made with yeast or sourdough culture, Often struggle this time of year. Cooler temperatures and dry conditions slow dough activity, leading to denser bread, poor overall volume, and lackluster oven spring. But none of this is insurmountable. Let's look at five simple ways to bake your best bread even when it's cold outside. (And if you're dealing with the opposite challenge, here are some tips for backing the transition Winter to summer.)

Photography by Patrick Marinello; Food styling by Kaitlin Wayne
1) Take care of your starter
I don't know about your house, but in mine, the average temperature swing in my kitchen from a warm summer day to the depths of winter is as much as 20°F. While 80F can work in July, 60F in January is A problem: it's too cold for my starter to thrive. To keep mine Sourdough Growing at a steady rate, the best environment is a temperature between about 72°F and 78°F—not too hot, not too cool. How do I achieve this temperature consistently?
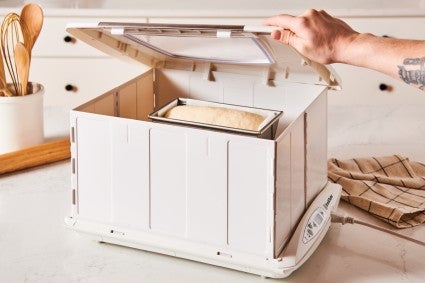
There are a variety of options. You can use a tool like this Sourdough home or a Brood and Taylor Profferwhich maintain an accurate, consistent temperature. If you do not have one of these tools, a warm place in the house will also do. (And as long as you're taking care of your starter, make sure you're cuddling yours, too Preferences for the best bread possible.)
Photography by Rick Holbrook; Food styling by Kaitlin Wayne
2) Manage dough temperature
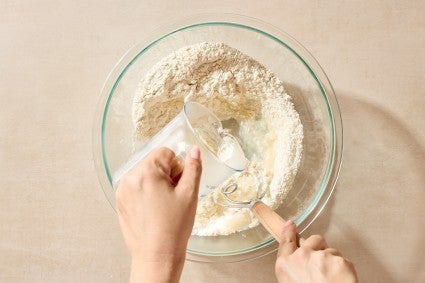
Now that your starter is nice and cozy, let's talk about mixing your batter. Like your starter, you want your dough to be comfortably warm, and you can achieve this by warming your water or liquids before mixing. In the colder months you need to use warmer water to achieve the same rate of fermentation that you could get using room temperature water in warmer months. If you start with cold or cool water, your dough will likely be very sluggish, fermenting slowly; Low fermentation activity directly impacts loaf volume, oven spring, interior structure and flavor. (For a full deep dive, see my colleague Barb Alpern's article on Desired dough temperature.)
Here's an example: With my flour and air temperature measuring in the low 60s these days, it's important that I use warm water – up to 100°F. Although this may seem high, remember that a dough that holds a comfortable 75 °F in summer will quickly lose heat in winter. So, when mixing your dough, use water in the warmer range and check your dough temperature after mixing with one of my basic bread-making tools: thermometer. A healthy dough temperature will be anywhere between 75°F and 80°F. In winter, starting on the high side of the range will get things off to a good start, knowing that the dough is likely to cool as it rises. If you warm your liquids but still end up with cold dough, all is not lost. We have some tips for this scenario.
Daniel Sikes
3) Guide bulk fermentation
So, we keep our starter active by keeping it in a warm ambient environment, using warm water for our mix, and our dough temperature measured between 75° F and 80° F. Everything should be perfect from here on out, right? Not quite. If we leave our homemade dough in a cold room temperature (62 ° F), in a short time it will cool significantly. The journey that began with so much promise will have you fixing a plane on the side of the road unless we intervene.
Just like with our sourdough starter, we want to provide a cozy environment for our dough as it undergoes bulk fermentation. Find a warm environment or create one with the tools at your disposal. Again, the Brood and Taylor Profer is a great solution. I usually just find a warm spot in my house – near the wood stove, or inside my microwave, which sits above the stove. My colleagues have their own preferences. Jessica Battilana puts her dough in the Clothes dryer. David Tamarkin loves being Dough warming mat. (A heating pad will also work.) Look for an environment that is between 75°F and 80°F for the best, most consistent rise.
Martin Philip
4) Do not let the dough dry out
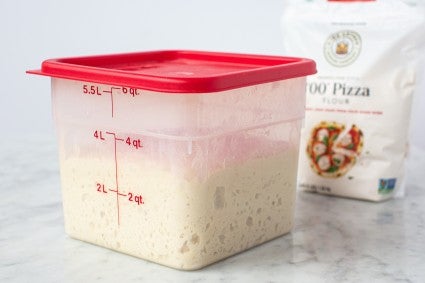
Another potential challenge for winter baking? Humidity (or lack thereof). As with the swing between hot summer and cold winter, low ambient humidity in cold months can take its toll on your bread. Dry conditions wick moisture away from rising dough, creating a skin on any exposed surface. Once the skin forms, the activity will not only slow down, but the skin removes the ability of the dough to stretch and will present challenges during shaping.
To avoid this, I like Dough containers With tight-fitting lids to cover mine Rising dough. If you followed our YouTube contentYou've seen them in action. And when I don't have a lidded container, my way to protect mixing bowls is a set of Bowl covers (Which also doubles as Bantan covers). They are indispensable. I avoid the use of towels and other coverings that are not moisture-proof.
Photography and styling by Martin Philip
5) Protect your bread
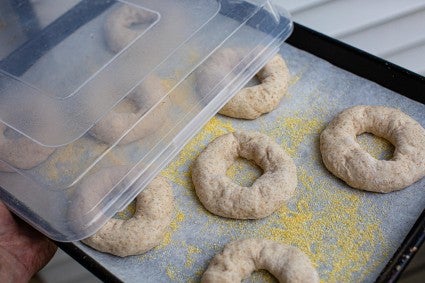
Just like bulk fermentation, our shaped loaves are also susceptible to drying or slowing in the cooler, drier winter conditions. They can develop a skin, which makes shaped bread difficult to score before baking and results in more irregular oven spring.
Stop the cuddling habit by covering proofing bread with a moisture barrier of some sort. The proofing chambers I mentioned, such as the Brood and Taylor, are a great tool. I tend to use my microwave, as I've mentioned. I add a jar of boiling water and keep the door closed. Smaller things like rolls can be tried on a Pan with a lid Or even placed in a large, food-safe plastic bag. Finally, there are many places to put a Dough to rise And keep it on the higher road.
So bakers, don't let the cold temperatures and dry conditions put the brakes on your big bikes. With a few simple methods you can keep things rising and enjoy your best bread, all year long.

XL Raisenne dough riser
206 reviews Reviews
$64.78
$109.95
cover photo by Rick Holbrook; Food styling by Martin Philip.